
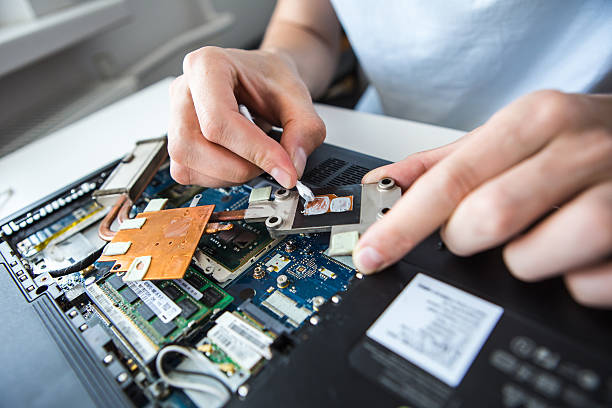
The Motherboard the central hub of a computer — the circuit board connecting the CPU, RAM, storage, and every peripheral. When it fails, symptoms range from random shutdowns to a machine that won’t power on at all. This guide covers what causes motherboard failure, the fixes you can safely attempt yourself, and when it’s time to call in a professional.
What Causes Motherboard Problems
Understanding the cause helps you diagnose the right fix:
- Overheating — poor ventilation, a failing fan, or accumulated dust causes excessive heat, which damages sensitive circuits and solder points over time.
- Power surges — a sudden voltage spike, often from a storm or unstable power grid, can fry delicate pathways on the board. A quality surge protector helps prevent this.
- Physical damage — mishandling during installation, drops, bent pins, or liquid spills can cause scratches, corrosion, or broken traces.
- Poor-quality power supply — a cheap or failing PSU can slowly degrade a motherboard over months rather than causing sudden failure.
- Age and wear — capacitors and other components naturally degrade over years of use, even under normal conditions.
Before You Start: Tools and Prep
Gather these before attempting any repair:
- Small precision screwdrivers
- Anti-static wrist strap — critical, since static electricity can instantly kill sensitive components
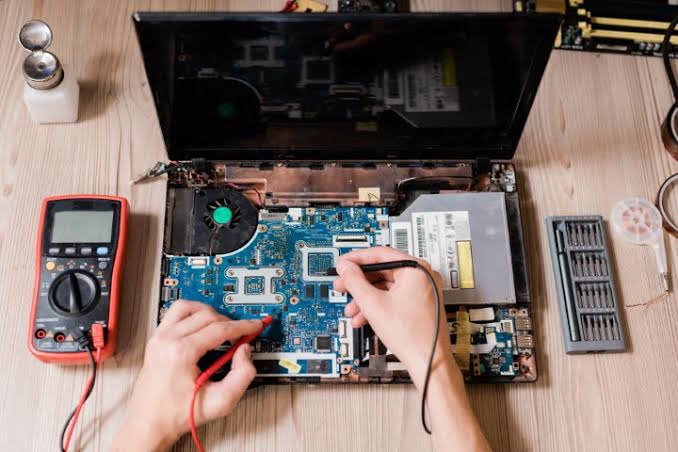
- Multimeter — for testing voltages and identifying shorts
- Thermal paste — if you’re removing and reseating the CPU
- Compressed air — for dust removal
- Soldering iron / hot air rework station — only needed for component-level repairs (capacitors, MOSFETs)
Also note your exact symptoms before starting: does the PC fail to power on at all, boot but show no display, shut down randomly, or have specific ports/peripherals not working? The symptom pattern narrows down the likely cause significantly.
Step-by-Step Diagnostic and Repair Process
1. Start With the Simple Checks
Most motherboard issues that look serious turn out to be simple connection problems:
- Reseat the RAM — remove each stick and firmly reinsert it. Loose RAM is one of the most common causes of a “no display” or failure-to-boot issue.
- Verify CPU seating — make sure the CPU is fully and correctly seated in its socket.
- Check all power connections — confirm the main power cable and CPU power cable are firmly connected.
- Clean out dust — use compressed air to clear dust buildup, especially around fans and heatsinks, since dust is a leading cause of overheating.
2. Clear the CMOS
If the simple checks don’t resolve it, resetting the CMOS often fixes firmware-related “no display” issues:
- Remove the small coin-shaped CMOS battery from the motherboard.
- Wait about 30 seconds.
- Reinsert the battery and attempt to power on again.
This resets hardware settings that may have become corrupted and is one of the most effective simple fixes available.
3. Listen for Beep Codes or Check BIOS Errors
If your motherboard has a speaker or your case supports POST diagnostics, beep codes or on-screen BIOS error messages give specific clues about which component is failing. Look up your motherboard manufacturer’s beep code chart to interpret them.
4. Test With Minimum Components
Disconnect everything non-essential (extra drives, expansion cards) and try to power on with only the CPU, one RAM stick, and the graphics output needed to boot. This helps isolate whether the motherboard itself is the problem or a specific attached component.
5. Inspect for Physical Damage
Visually examine the board for:
- Burnt or discolored areas
- Swollen or leaking capacitors
- Corrosion (especially after any liquid exposure)
- Bent pins in the CPU socket
6. Component-Level Repair (Advanced)
If you’ve identified a specific failed component:
- Replace the CMOS battery if the system loses time or BIOS settings repeatedly.
- Use a multimeter to identify shorts on the power rails (commonly 12V on desktops, 19V on laptops).
- Replace damaged capacitors or MOSFETs using a hot air rework station — this requires real soldering skill and is where many DIY repairs should stop unless you’re experienced.
- Repair damaged traces or use solder bridges for broken circuit pathways.
This level of repair carries real risk of further damage if done incorrectly, and is the point at which many guides recommend professional help.
After the Repair: Confirm Stability
Once your PC boots successfully, don’t assume the problem is fully solved:
- Run a stress test (e.g., Prime95 for CPU, FurMark for GPU) to push the system under load.
- Monitor temperatures to confirm they stay within safe ranges during stress testing.
- If the system remains stable under load, the repair was likely successful.
Common Mistakes to Avoid
- Skipping the anti-static wrist strap — a single static discharge can destroy components instantly.
- Using excessive force — never force a card into a slot or a cable into a port; if it doesn’t fit easily, something is misaligned.
- Powering on repeatedly after a failed attempt — repeated power cycling on a damaged board can cause additional damage.
- Skipping BIOS updates only when actually needed — unnecessary BIOS updates carry their own risk and shouldn’t be done speculatively.
Repair vs. Replace
Not every motherboard problem is worth fixing yourself. As a rough guide:
- Simple repairs (reseating components, replacing the CMOS battery, cleaning) often cost little to nothing and are safe for most users to attempt.
- Professional component-level repairs (soldering, trace repair) typically run in the range of $50–$150 for straightforward issues, more for complex board-level work.
- Full replacement is often the more practical choice when damage is extensive, when the board is older, or when repair costs approach the price of a new motherboard.
Conclusion
Most motherboard “failures” turn out to be simple connection or firmware issues — reseating RAM, clearing the CMOS, and cleaning out dust resolve a surprising number of cases. If those steps don’t work, beep codes, visual inspection, and a multimeter narrow down the actual failure point. Component-level repairs (soldering, trace fixes) are possible but require real technical skill and carry risk — if you’re not confident at that stage, a professional diagnosis is usually the safer and often cheaper path in the long run.