
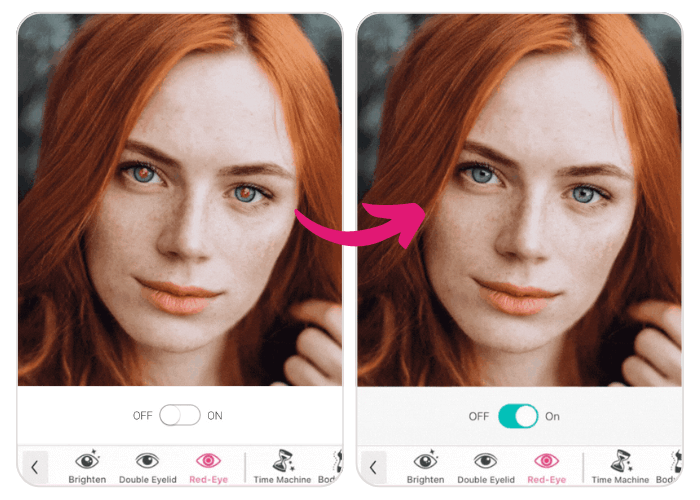
Red eye happens when a camera flash reflects off the blood vessels behind the retina, turning what should be a great photo into something a bit unsettling. The good news: your iPhone has a built-in tool to fix it in seconds, no extra apps required. This guide covers the built-in method, what to do when it doesn’t work, and third-party alternatives for trickier photos.
Using the Built-In Photos App (No Extra App Needed)
The iPhone’s Photos app has a dedicated red-eye correction tool built right into the editor.
- Open the Photos app on your iPhone.
- Tap the photo that has the red-eye issue to open it full-screen.
- Tap Edit in the top-right corner.
- Tap the eye icon (it looks like an eye with a slash through it) among the editing tools.
- Tap directly on each red eye in the photo you want to fix — zoom in first if it helps you tap precisely.
- Repeat for every red eye in the image, including other people if it’s a group photo.
- Tap Done in the top-right corner to save your changes.
That’s it — the tool automatically detects the red pixels around where you tapped and neutralizes them, restoring a more natural eye color.
A Few Things to Know
- It only appears when relevant. The red-eye tool typically only shows up for photos taken with flash, since that’s when red-eye occurs. If you don’t see the icon, the photo may not have been flagged as flash-affected.
- You can undo it. If the correction doesn’t look right, tap Revert on the main edit screen to restore the original photo and try again.
- It works on Live Photos too. You can remove red-eye from a Live Photo and it will still play normally afterward.
- It doesn’t work on video. The red-eye tool only applies to still photos, not video clips.
When the Built-In Tool Doesn’t Work Well
The native tool is reliable for straightforward cases, but it can struggle with blurry faces, unusual angles, or eyes that are only partially visible. If your results don’t look right, a third-party photo editor with more advanced retouching tools is the next step. Options worth trying include:
- Adobe Photoshop Express — offers a dedicated eye retouching feature under its Looks/Retouch tools, with more manual control than the native tool.
- CapCut — includes a retouch feature covering red-eye correction alongside broader eye and face retouching (brightness, size adjustments).
- YouCam Makeup — an automatic red-eye detection and removal tool aimed at selfies and portraits, plus broader eye-editing features like color changes.
Most of these apps follow a similar pattern: open the photo, find the retouch or eye-correction tool, and tap the affected area — similar to the native Photos workflow, just with more fine-tuning available.
Preventing Red Eye in the First Place
Since red-eye comes from flash light bouncing off the retina, a few habits reduce how often it happens:
- Use natural or ambient light instead of flash when possible.
- Turn on the room lights before taking an indoor flash photo — smaller pupils (from a brighter room) reflect less red-eye than fully dilated ones.
- Ask the subject to look slightly away from the lens rather than directly into it, which reduces direct reflection back into the camera.
Conclusion
For most red-eye photos, the built-in Photos app tool is the fastest fix: Edit → tap the eye icon → tap each red eye → Done. It requires no download and works directly on your existing photos. If a particular photo doesn’t correct cleanly — usually due to blur or an awkward angle — a third-party retouching app like Photoshop Express or CapCut gives you more manual control to get it right.